
Introduction
If you're an avid Minecraft player, you know that building houses is an essential part of the game. However, creating a unique and aesthetically pleasing house can sometimes be a challenge. That's where blueprints come in handy! In this article, we will guide you through the process of building Minecraft houses step by step using blueprints. Whether you're a beginner or a seasoned player, this guide will help you create stunning houses in no time.
Benefits of Using Blueprints
Blueprints provide a multitude of benefits when it comes to building houses in Minecraft. Firstly, they act as a visual guide, helping you plan and execute your construction more efficiently. Blueprints also save you time and effort by providing a pre-designed layout that you can follow. Additionally, they allow you to replicate intricate designs and structures accurately. So, let's dive into the step-by-step process of building Minecraft houses using blueprints.
Step 1: Choosing the Right Blueprint

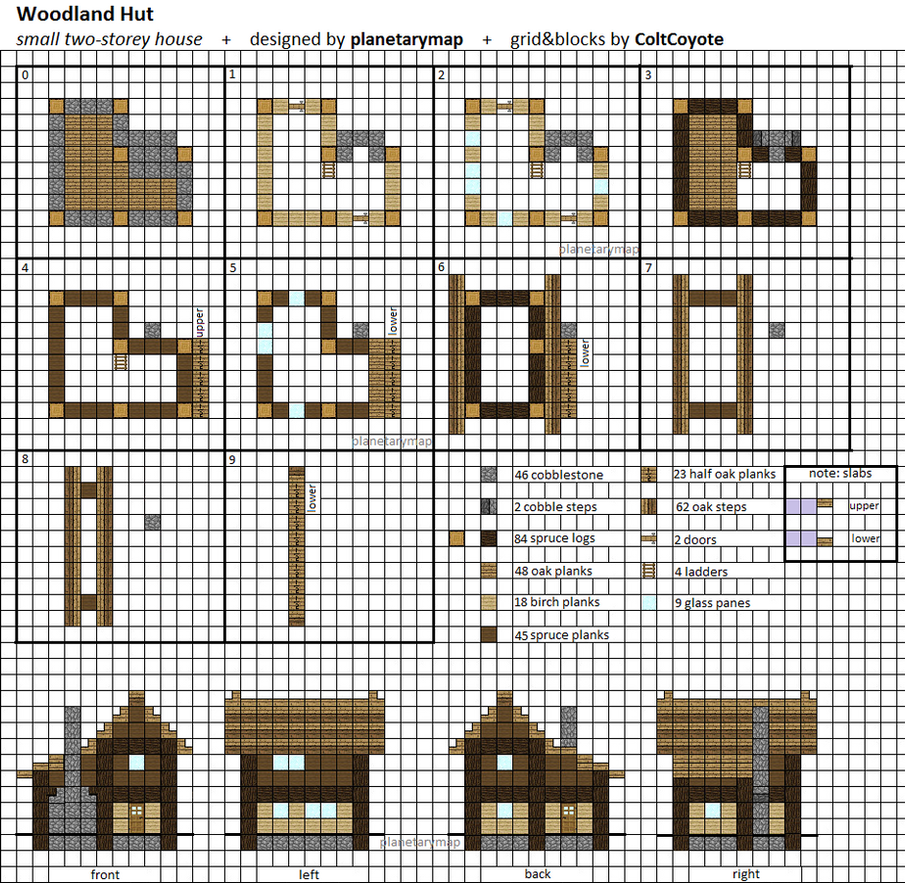
Before you start building your Minecraft house, it's crucial to select a blueprint that matches your preferences and skill level. There are various websites and forums dedicated to sharing blueprints, so take your time to explore different options. Choose a blueprint that fits the style you want to achieve and make sure it includes step-by-step instructions.
Step 2: Gathering Materials

Once you've chosen a blueprint, it's time to gather the necessary materials. Each blueprint will have a list of required blocks and items, so make sure you have everything before starting the construction. Collecting materials beforehand will save you from interruptions and provide a smoother building experience.
Step 3: Preparing the Building Site

Before you begin construction, prepare the building site by clearing the area and leveling the ground. Ensure that there is enough space to accommodate the blueprint's dimensions. It's also helpful to mark the corners of the house using temporary blocks or torches, making it easier to follow the blueprint's layout.
Step 4: Foundation and Walls
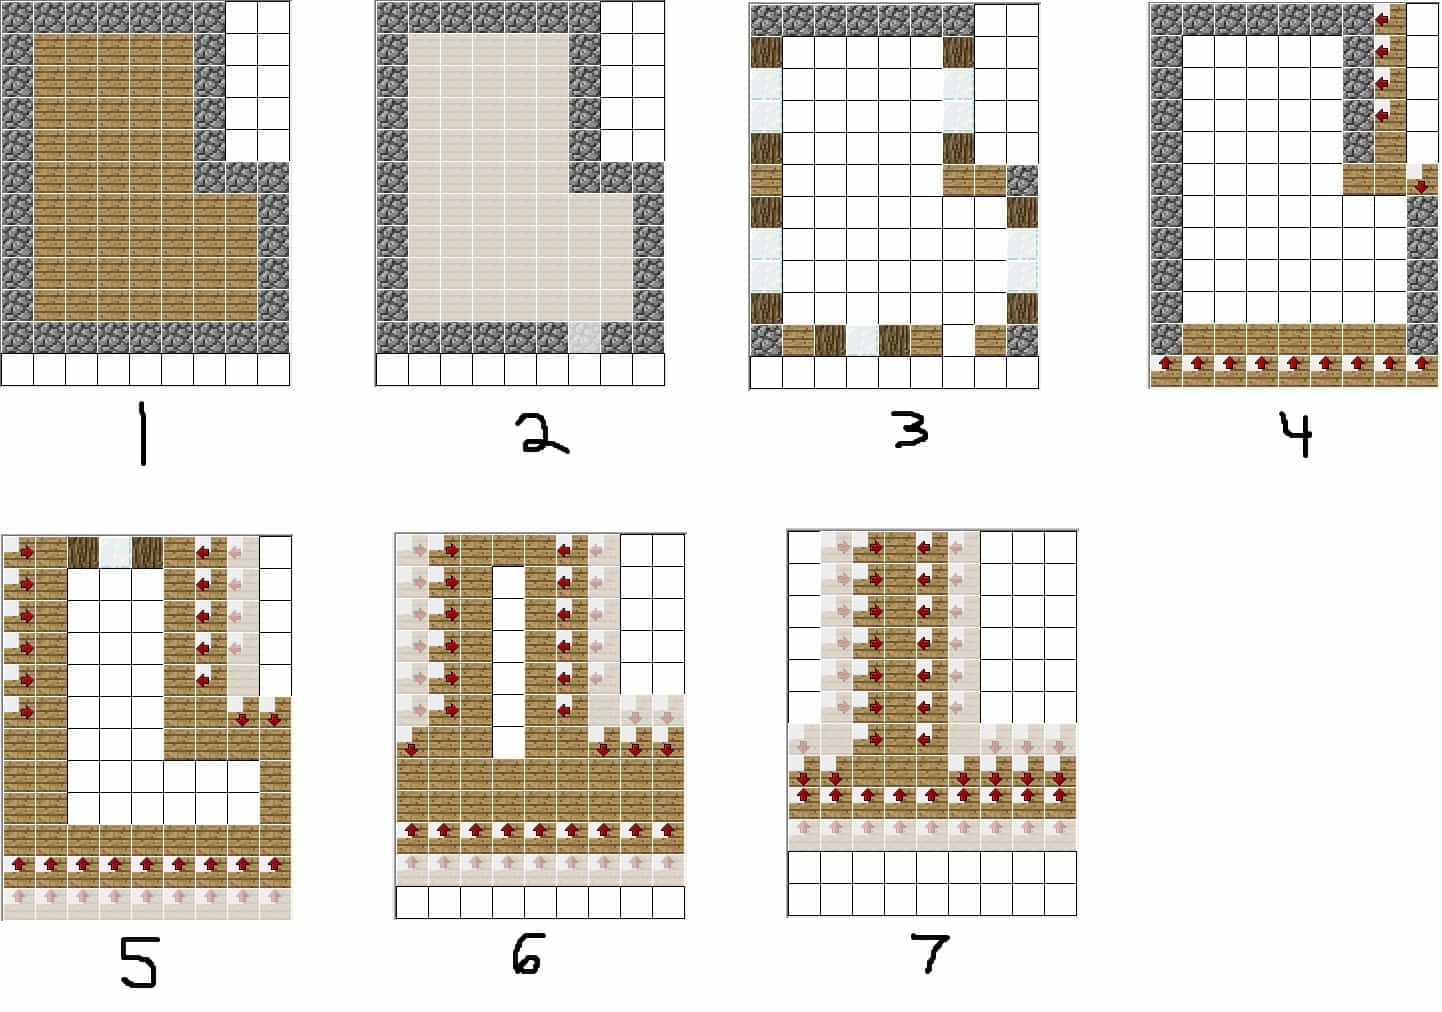
Start building the foundation of your Minecraft house as per the blueprint's instructions. Lay down the blocks and create the walls using the designated materials. Pay attention to the blueprint's measurements to ensure accuracy. Building the foundation and walls correctly forms the skeleton of your house.
Step 5: Floors and Ceilings
Once the walls are complete, it's time to add floors and ceilings. Follow the blueprint's guidance to construct each level of the house. Ensure that the floors are level and the ceilings are at the desired height. This step brings your house closer to its final form.
Step 6: Roofing

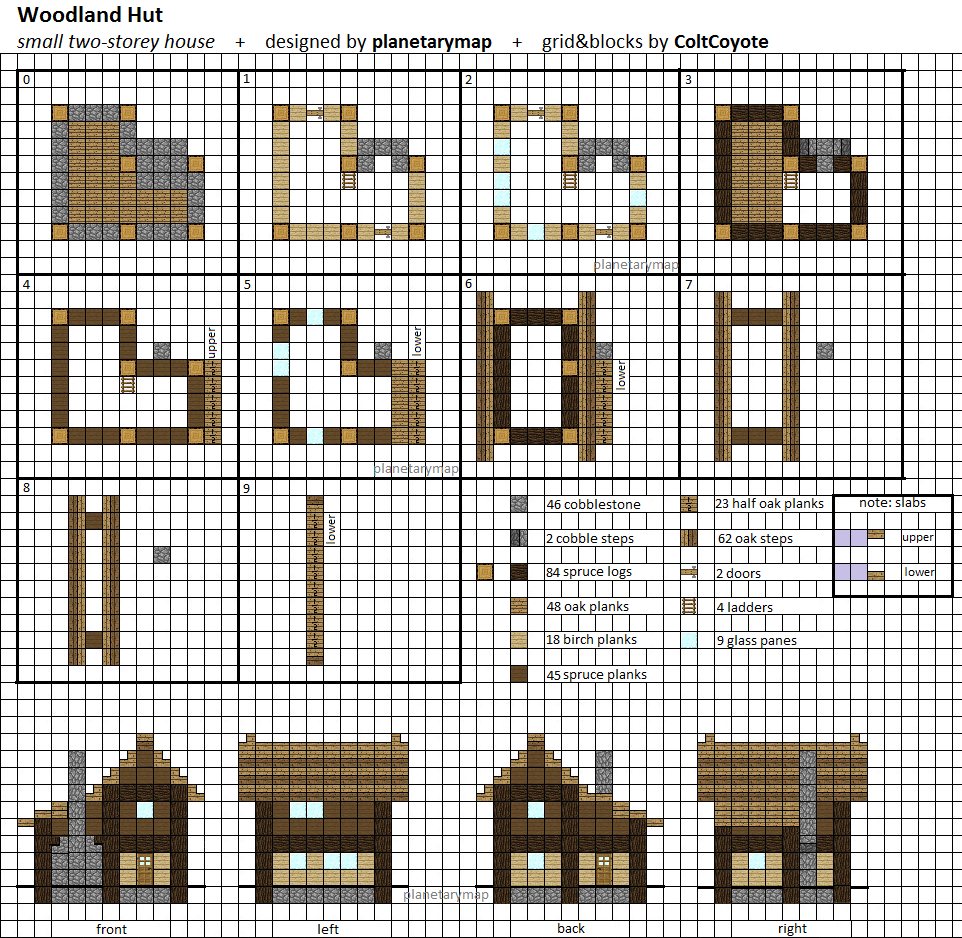
The roof is an essential element of any house, and Minecraft is no exception. Use the blueprint's instructions to create the roof structure using the designated blocks. Pay attention to the roof's shape and design, as it significantly contributes to the overall aesthetic of your house.
Step 7: Doors and Windows

Next, add doors and windows to your Minecraft house. Follow the blueprint's guidelines to place them in the designated areas. Doors provide access to your house, while windows enhance its appearance and allow natural light to enter. Customize the doors and windows based on your preferred style.
Step 8: Interior Design

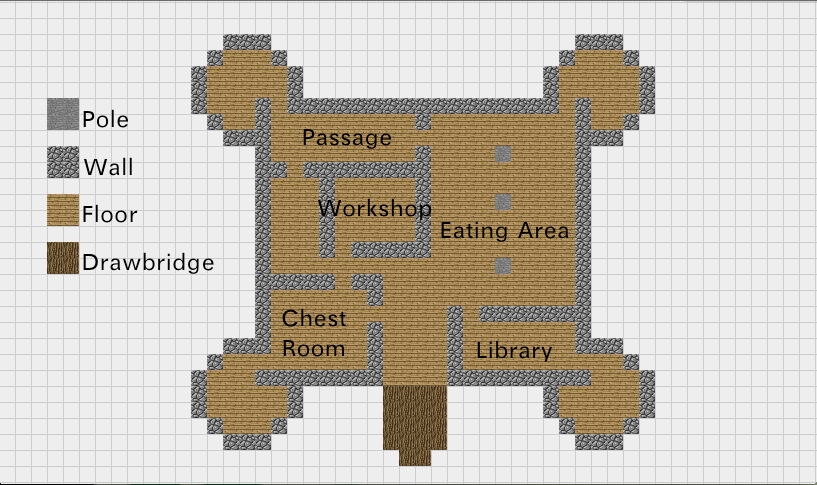
Now that the exterior of your house is complete, it's time to focus on the interior. Furnish each room according to your blueprint's suggestions or your personal taste. Place furniture, decorations, and functional items to make your Minecraft house feel like a home. Let your creativity shine as you design each room.
Step 9: Landscaping
No house is complete without a beautiful surrounding landscape. Use the blueprint's recommendations to add trees, flowers, pathways, and other elements to your Minecraft house's exterior. Landscaping adds depth and charm to your creation, making it stand out in the game.
Step 10: Final Touches

Lastly, review your Minecraft house and make any necessary adjustments or additions. Pay attention to small details, such as lighting, signs, and finishing touches. Take a step back and admire your creation. Congratulations, you've successfully built a Minecraft house using blueprints!
Meta Description
Learn how to build Minecraft houses step by step using blueprints. This comprehensive guide provides detailed instructions, tips, and tricks for creating stunning houses in the game. Enhance your Minecraft skills and create unique structures today!
Meta Keywords
Minecraft, house building, blueprints, step by step, construction, Minecraft houses, building guide, Minecraft tips, Minecraft tricks
